
After completing a playable prototype for the core game of Warhold I began work on an expansion. In this expansion two new races would be available for play (making the game playable for up to 6 players at one time) and also adding a new mechanic in the form of barbarians for hire. You can find the rules for this expansion below.
Warhold: Raids
Welcome to Warhold: Raids, an expansion to Warhold. In this expansion you will play two new races, use over 50 new cards and engage with barbarians in a new mechanic that will allow you to become the architect, or victim of, surprise attacks on Strongholds and enemy forces.
The Contents of this Box
What you should have in your box:
Tiles
15 Game Tiles. Each tile is split into nine smaller squares, these smaller squares are referred to as ‘Map Tiles’ or just ‘Tiles’. All future mention of ‘tiles’ will refer to the small squares.
Race and Monster Minis
Lizardmen – 1 Lord Drak-Kor, 10 swamp warriors, 10 scouts, 6 tri-riders, 3 ballistae, 6 engineers, 6 healers
Wolfen – 1 Raglinak Sharp Claw, 10 fighters, 10 hunters, 6 talon guards, 3 giant rock slings, 6 engineers, 6 healers
19 monster minis
41 barbarian minis
Stronghold, Event, Monster Reference and Unit Sheets
2 Stronghold sheets (one for each race) that detail the level of your buildings and walls within your stronghold, your Lord’s stats and items and your unit stats and abilities
1 Monster, Barbarian and Upkeep reference sheet
Cards
There are six different types of cards: monster, random encounter, Barbarian Raids (split into 3 different decks – minor, moderate and major), equipment, natural disaster and glorious boon.
10 monster encounter cards
10 random encounter cards
21 barbarian raid cards
10 equipment cards
5 natural disaster cards
5 glorious boon cards
These cards can be placed in the decks of the same type from the base game. The barbarian raid cards form 3 new decks.
Location Tiles
In addition to the above-mentioned tiles for map creation you should also have:
2 Stronghold tiles (one for each race)
The Races
Two new races are being introduced in Warhold: Raids – Lizardmen and Wolfen. Each race has its own units, Lord and unique abilities to enhance the gameplay of Warhold. The original 4 races are able to play alongside the new races in this expansion.
Lizardmen are swamp-dwelling warriors who have tamed the giant lizards in their swamps. They ride into battle on fearsome mounts and utilize unique tactics in combat. Wolfen are large, ferocious predators who abhor riding over using their own two feet. Wolfen are fast-moving, savage fighters with a bloodlust matched by none.
Lizardmen
Lizardmen are reptilian humanoids who live in the swamps of Warhold. They rarely venture out of their domain and avoid contact with the other races whenever possible. They are fierce fighters who never hesitate when the defense of their territory is called for. Over countless generations they have tamed the great beasts of their swamps, most notably the Tri-horn and the carnivorous Deathclaw. Riding these beasts into battle the Lizardmen wade through their enemies, leaving broken bodies in their wake.
Lord Drak-Kor
Drak-Kor was part of the ‘Lord’s Spawning’ – when the High Lord of the Lizardmen fertilizes eggs himself to produce an heir. The children of this spawning are raised learning only combat and when they mature they are pitted against each other in a gruesome battle royale until only the strongest one is left standing. That last warrior is named the heir to the High Lord and soon deposes him and assumes command of the Lizardman tribes. Drak-Kor is the fiercest Lizardman to lead the tribes in generations and is determined to stop the encroachment on their land by the other races.
Lord Drak-Kor: M: 7, H: 4, W: 3, A: 7, HP: 5, O: 0/-1, L: 4
Special – Ferocious Mount: After Drak-Kor makes his attack his mount may make a single attack using the same To Hit (H) and To Wound (W) stats as Drak-Kor. Any wounds caused by this attack count as 2
Swamp Warriors
Swamp Warriors are the infantry unit for Lizardmen. They are a dependable, stealthy unit.
Swamp Warrior: M: 5, H: 4, W: 4, A: 4, HP: 2, O: 0/0,
Cost – 40/40 Upkeep – 10/10
Scouts
Scouts are the ranged unit of the Lizardmen. They are the physically weakest of the Lizardmen, however, they have great agility and excel at ranged combat.
Scout: M: 5, H: 5, W: 5, A: 4, HP: 2, O: 0/0
Cost – 40/40 Upkeep – 10/10
Tri-Riders
Tri-Riders are the cavalry unit for the Lizardmen. Riding into battle on the terrifying Tri-Horns they are a fearsome adversary who strike fear into the bravest of hearts.
Tri-Rider: M: 7, H: 4, W: 3, A: 5, HP: 3, O: 0/-1
Special – Horned Charge: If this unit moved this turn it gains +2 attacks
Cost – 90/90 Upkeep – 30/25
Ballista
Ballistae are the siege engine of the Lizardmen.
Siege Tower: M: 4, H: 5, W: 2, A: 1, HP: 3, O: +2/-2
Special – Siege Engine: This unit may not move and shoot on the same turn. Range 3. Wounds inflicted count as 3. When next to a Stronghold that Stronghold’s walls are reduced by 1 level to a minimum of 0. Multiple units with this rule stack. Siege engine attacks ignore modifiers and special rules that affect To Hit and To Wound; a siege engine will ALWAYS hit on its To Hit and To Wound stats.
Special – Piercing Bolt: Ballistae may choose to make a special piercing attack instead of their regular attack. If there are more than 1 enemy in a row on an x-y axis from the ballista (this attack may not be used on any diagonal) the ballista may hit all units on that line – up to 3 units. This attack has a range of 1-3. Each wound caused counts as 2 wounds.
Cost – 70gold Upkeep – 20gold
Wolfen
Wolfen are a tribal race prone to infighting. They often gather together in tribes comprised of several family groups. While lone Wolfen present a minimal threat a pack of Wolfen is a fearsome adversary. In recent years some tribal leaders have tried to unite the various tribes under one rule in the hopes that the Wolfen race can take a more prominent position among the other great races of Warhold.
Special Ability: Tribal Warriors – If a Wolfen unit has 2 or more adjacent allies it adds 1 to its rolls of To Wound.
High Chief Raglinak Sharp Claw
Raglinak began his rise to prominence as a simple warrior in an inconsequential tribe. Unlike most other Wolfen, Raglinak had a vision of a future where the Wolfen nation was powerful enough to challenge the other great races of Warhold. He set out to achieve his dream with a handful of fighters that soon grew to dozens and then hundreds of followers. He wrested control of his tribe from the aging chief and started to subjugate nearby tribes. In less than 5 years he went from an unknown warrior to the most powerful chief the Wolfen tribes have ever known. He rules through force of arms and inspires his troops with his strength. Criticism of his lack of charisma or other leadership qualities are met with the large battle axe he carries into battle. He now commands a majority of the Wolfen tribes and has set his sights on the other races inhabiting his world.
Raglinak Sharp Claw: M: 6, H: 3, W: 3, A: 6, HP: 5, L3, O: -1/0,
Special – Cavalry Killer: And rolls To Wound of 6 against a cavalry unit kills that unit instantly regardless of how many hit points it has remaining.
Fighters
Wolfen fighters are an infantry unit of the Wolfen. They are the most numerous unit of the Wolfen nation and often hunt in small packs to project strength.
Fighter: M: 6, H: 4, W: 3, A: 4, HP: 2, O: 0/0
Cost – 50/50 Upkeep – 15/15
Hunters
Wolfen hunters are the ranged unit of the Wolfen. They are ferocious and deadly with heavy throwing spears used to bring down large prey on the great plains of the Wolfen tribes.
Hunters: M: 6, H: 4, W: 4, A: 3, HP: 2, O: 0/0
Cost – 50/50 Upkeep – 15/15
Talon Guard
Talon Guard are an elite, heavily armed infantry unit. They are an anti-infantry unit who disdain using mounts of any kind and prefer to use their own two feet. Talon Guard are disciplined warriors trained to work together from a young age. Talon Guard count as cavalry for the purposes of card use (ie. Freelance Warrior – cavalry) and maximum number of units only.
Talon Guard: M: 5, H: 4, W: 3, A: 5, HP: 3, O: 0/-1
Special – Pack Attacks: For each Talon Guard in an adjacent tile gain +1 attacks.
Cost – 70/70 Upkeep – 25/15
Giant Rock Slings
Giant Rock Slings are the siege engines of the Wolfen.
Trebuchet: M: 4, H: 5, W: 2, A: 1, HP: 3, O: +2/-2
Special – Siege Engine: This unit may not move and shoot on the same turn. Range 3. Wounds inflicted count as 3. When next to a Stronghold that Stronghold’s walls are reduced by 1 level to a minimum of 0. Multiple units with this rule stack. Siege engine attacks ignore modifiers and special rules that affect To Hit and To Wound; a siege engine will ALWAYS hit on its To Hit and To Wound stats.
Special – Big Effin’ Rock: Giant rock slings may make a special attack instead of using their regular attack. This attack has a range 1 and does 5 wounds.
Cost – 60gold Upkeep – 15gold
Monsters
In Warhold – Raids several new monsters have been introduced.
Lords
1 new Lord monster has been introduced.
Manticore
Manticores are large, incredibly strong beasts. They are filled with rage which overrides their intelligence and propels them into battle with the nearest victim it can locate.
Manticore: M: 8, H: 4, W: 3, A: 6, HP: 5, O: 0/-1
Special – Tail Strike: After its normal attacks an additional attack may be made. On a roll of 6 To Hit this attack wounds automatically and causes 2 wounds.
Large
1 new large monster has been introduced.
Demon Wolves
Demon wolves are the larger brethren of Hell Hounds. More ferocious and cunning these apex predators are experts at tracking down prey and dispatching it with minimal effort.
Demon Wolf: M: 7, H: 4, W: 3, A: 5, HP: 3, O: -1/0
Small
2 new small monsters have been introduced.
Fiends
Fiends are swamp-dwelling demons that take particular delight in catching their prey unawares and dragging them into the depths where they watch them flail as they slowly drown.
Fiend: M: 5, H: 4, W: 5, A: 2, HP: 2, O: 0/0
Special – Toxic Claws: To Hit rolls of 6 wound automatically.
Skeleton Archers
Skeleton archers are a ranged skeleton unit. Like regular skeletons they are the re-animated remains of fallen warriors brought back to plague the living.
Skeleton Archer: M: 4, H: 5, W: 5, A: 2, HP: 2, O: 0/0
The Map
The map is created in the same way as in the base game.
Warhold: Raids introduces a new tile type to the map – swamps. Swamp tiles can be placed alongside the original tiles from the base game to create new and interesting map variations.
Swamps
Swamp tiles are green-black, marsh-covered squares. To move across a swamp tile it requires 2 movement points.
Setup
Setup in Warhold: Raids is the same as in the base game. When placing the decks of cards next to the map also place the three small Barbarian Raid decks out. Unlike the other decks of cards the Barbarian Raid cards do not get reshuffled when they are exhausted. This limits the amount of raids that can be purchased.
The Turn
The Turn operates exactly the same way as in the base game with 1 exception:
Monster Turn: End of Turn Phase
The Monster Turn now has an End of Turn phase. During the End of Turn phase of the Monster Turn players may purchase Barbarian Raids to launch at their foes. Starting with the player whose turn comes after the Monster Turn and continuing in a clockwise fashion, players may purchase Barbarian Raids. There is not limit on how many Raids a player can purchase in one turn if their gold allows. Players who passed on a buying a Raid cannot do so later in the phase. If an opponent launches a surprise Raid at a player who passed on buying a Raid that player cannot now decide to purchase a Raid.
As soon as a Raid is purchased the player who purchased it sets the Barbarians on the map. Barbarians must be placed at least 1 tile away from any units, Towns and Strongholds. Barbarians will move and attack on the next monster turn after they are placed. Barbarians may not be placed on water tiles.
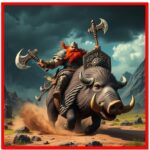
Barbarians
Warhold: Raids introduces a new group of adversaries – Barbarians.
During the Monster End of Turn Phase players may purchase the help of barbarian raiders to harass, threaten and attack their enemies. Barbarians are unpredictable and not very honorable. All Barbarian Raids cost the same amount of gold but the force sent to help the player can vary drastically.
Barbarian Raid Cost: 250gold
Once a raid is purchased turn over the top card of that deck to see what specific units the barbarian leader is sending to aid you. There are 3 unit types a barbarian leader may send.
Axemen
Barbarian axemen are infantry units. They are the base unit for the barbarian hordes.
Axeman: M: 5, H: 4, W: 4, A: 4, HP: 2, O: 0/0
Bola Throwers
Bola Throwers are a ranged unit. Moderately strong they perform a supporting function for the barbarian hordes.
Bola Thrower: M: 5, H: 4, W: 4, A: 3, HP: 2, O: 0/0
Horsemen
Horsemen are cavalry units. They are the elite fighters among the barbarian hordes.
Forest Warden: M: 7, H: 4, W: 3, A: 5, HP: 3, O: 0/0
Barbarians love nothing so much as blood and gold. Being mercenaries all barbarians carry some of their fee on them. When a barbarian unit is killed the player whose unit killed it immediately receives 20 gold.
Placement
After a raid has been purchased, and the units revealed, the controlling player my place the barbarian units anywhere on the map as long as they are not directly adjacent to any units or Strongholds. This means barbarians may be placed within range attack distance of units and Strongholds, including on a diagonal from them. Barbarians must all be placed together, with each barbarian unit placed adjacent to one of the previously placed units (aside from the first unit placed).
Barbarian Turn
Barbarians take their turn during the Monster Turn. They move and act exactly as monsters with 1 difference: they do not move towards towns, nor will they remain on town tiles if they cross them. If a Stronghold falls to barbarians (at least half +1 of the tiles in a Stronghold are occupied by barbarians and there are no other units inside the Stronghold except for monsters) the Stronghold is destroyed and removed from the map. Unlike when monsters destroy a Stronghold Ruin tiles are not placed where the Stronghold stood – barbarians have looted their conquest and taken anything of value. If both barbarians and monsters occupy a Stronghold with no player units whichever has more units in the Stronghold will determine whether Ruin tiles are placed or not. If there are equal monsters and barbarians in a Stronghold (2 and 2) the Stronghold is not destroyed but remains in a state of limbo. Players may clear out the Stronghold and take it over as normal provided at no point either monsters or barbarians control more than half the spaces in the Stronghold while there are no player units inside.
Barbarians live for fighting and are always looking for a new foe to engage. They will move towards the nearest unit (including units of the player who purchased the raid), just like monsters, and will then attack units they are in range of. Barbarian raids can be used to weaken a defended Stronghold, attack an approaching army or to cause general havoc among warring players.
Barbarians will attack while in a town and will attack player units in towns. Barbarians will never attack other barbarian or monster units. Monsters will never attack barbarians.
The Barbarian Lord
In this expansion there is a chance that the Barbarian Lord will make an appearance. If you draw the disaster card of this name place the Barbarian Lord token next to your Lord token (or as close as possible). The Barbarian Lord will now engage in a fight with your Lord.
The Barbarian Lord gathers fighters around him wherever he goes. At the start of each Monster Turn roll to see what type of unit has joined the Barbarian Lord.
1-2: Barbarian axeman
3-4: Barbarian Bola Thrower
5-6: Barbarian Horseman
Place the rolled unit on an adjacent tile to the Barbarian Lord. Barbarians placed this way follow the rules for monster placement.
The Barbarian Lord will always attack the Lord he was placed beside and will follow that Lord if he moves away, ignoring all other opponents. If there are more than 1 equal-distance paths, one with enemy units and one without, Barbarian Lord will always take the path without units. If the Barbarian Lord kills the Lord he was placed beside he will then move directly towards the closest Lord token on the map. He will not seek out other fights. Barbarian Lord will suffer attacks of opportunity to reach a Lord instead of stopping to fight.
If Barbarian Lord is slain the player who killed him immediately receives 100 gold and the top card from the equipment pile.
Barbarian Lord
The Barbarian Lord is the toughest barbarian around. He directs the barbarian hordes in their raids and on occasion singles out a fighter worthy of his personal attention.
Barbarian Lord: M: 7, H: 3, W: 3, A: 6, HP: 5, O: 0/-1
Special – Warleader: At the start of the Monster Turn roll a D6 and place a barbarian unit next to Barbarian Lord depending on the result: 1-2 – Axeman, 3-4 – Bola Thrower, 5-6 – Horseman


Comments by WintersLost